Managing a large inventory on Amazon can be a time-consuming task if you’re adding products one by one. Fortunately, Amazon offers a feature that allows you to streamline this process by adding products in bulk. In this article, we’ll walk you through the steps to efficiently add bulk products to Amazon and boost your e-commerce productivity.
**1. Access Your Amazon Seller Central Account:**
– Start by logging in to your Amazon Seller Central account, the hub for managing your Amazon seller activities.
**2. Navigate to the ‘Inventory’ Tab:**
– In Seller Central, locate the ‘Inventory’ tab, where you can access various tools for managing your product listings.
**3. Choose the ‘Add Products via Upload’ Option:**
– Under the ‘Add a Product’ section, select ‘Add Products via Upload.’
– This method is ideal for adding new products to your Amazon inventory in bulk.
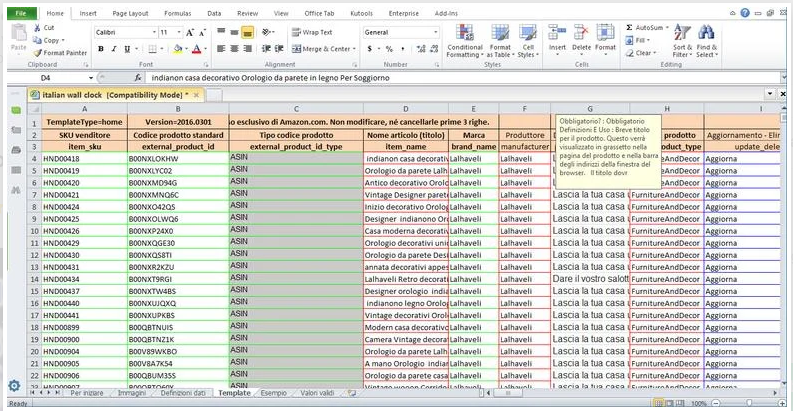
**4. Download the Inventory File Template:**
– Amazon provides an Excel-based inventory file template designed to facilitate bulk uploads.
– Download the template, which contains fields for essential product details.
**5. Populate the Inventory File:**
– Open the downloaded inventory file template and begin filling in the product details for your listings.
– Be meticulous with information like product titles, descriptions, prices, SKUs, and quantity.
**6. Use the Required Fields:**
– Ensure you complete all mandatory fields in the template. These typically include SKU, title, price, and product type.
– Utilize additional optional fields to provide more comprehensive product information.
**7. Check for Errors and Warnings:**
– Before uploading the inventory file, use Amazon’s validation tool to check for errors and warnings.
– Correct any issues to ensure a smooth upload process.
**8. Save the Inventory File:**
– Once the file is error-free, save it in the required format, often as a .csv or .txt file.
**9. Upload the Inventory File:**
– Return to Seller Central and select the ‘Upload your inventory file’ option.
– Choose the saved inventory file and initiate the upload process.
**10. Monitor the Upload Status:**
– Amazon will provide information on the status of your upload. Monitor this closely to ensure it completes successfully.
**11. Review Your Listings:**
– After the upload is complete, review your product listings in Seller Central to ensure they appear as intended.
– Make any necessary adjustments or corrections.
**12. Monitor Inventory Levels:**
– Regularly monitor your inventory levels to prevent overselling or running out of stock.
– Use Amazon’s reporting tools to track sales and inventory performance.
**13. Consider Third-Party Software:**
– For sellers with large inventories or complex product data, third-party software solutions can simplify the bulk upload process and provide advanced features for managing listings.
**14. Stay Compliant with Amazon Policies:**
– Ensure that your product listings adhere to Amazon’s policies and guidelines to avoid potential issues with product removal or account suspension.
**Conclusion: Streamlining Your Amazon Business**
Adding bulk products to Amazon can significantly boost your e-commerce efficiency and productivity. By following the steps outlined in this guide, you can save valuable time, reduce errors, and effectively manage a large inventory on the platform. Regularly updating and optimizing your listings is essential for success on Amazon, and bulk uploads are a powerful tool to help you achieve that goal.
